HOW WE CAN HELP?
KoBoForm – Question types
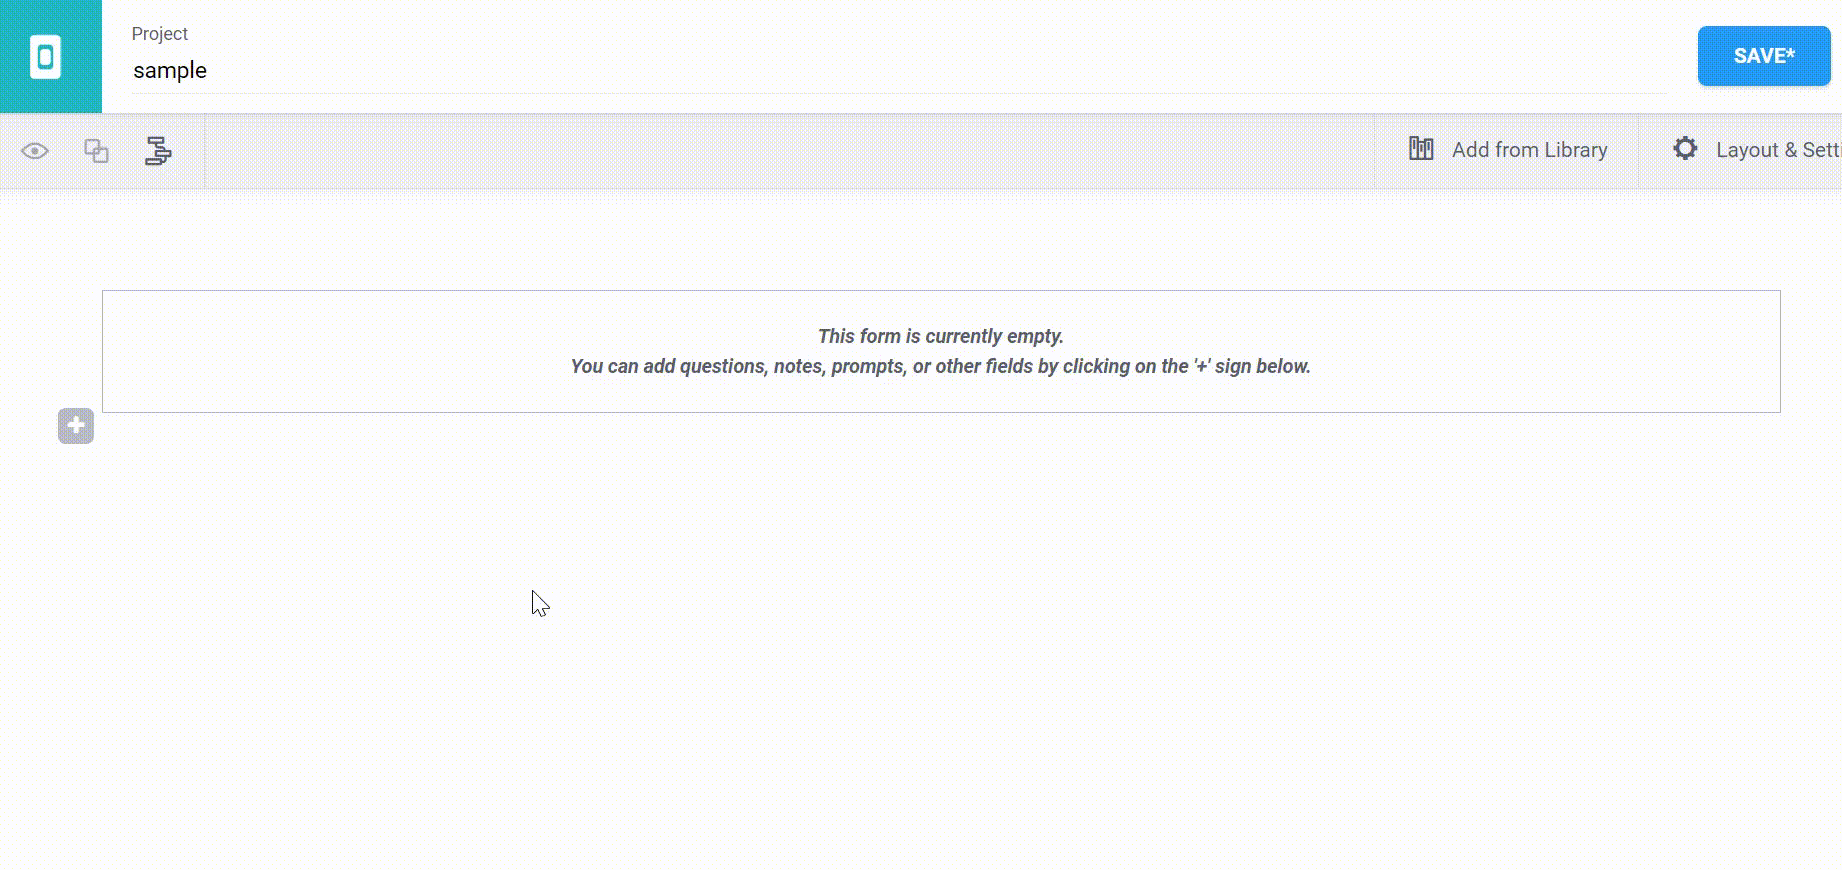
To make things easier when developing a new questionnaire, KoBoToolbox created a visual drag and drop tool to develop surveys, called KoBoForm. This article describes all the different question types available to you in KoBoForm. If you prefer writing your survey offline, you can do so using XLSForm, have a look here.
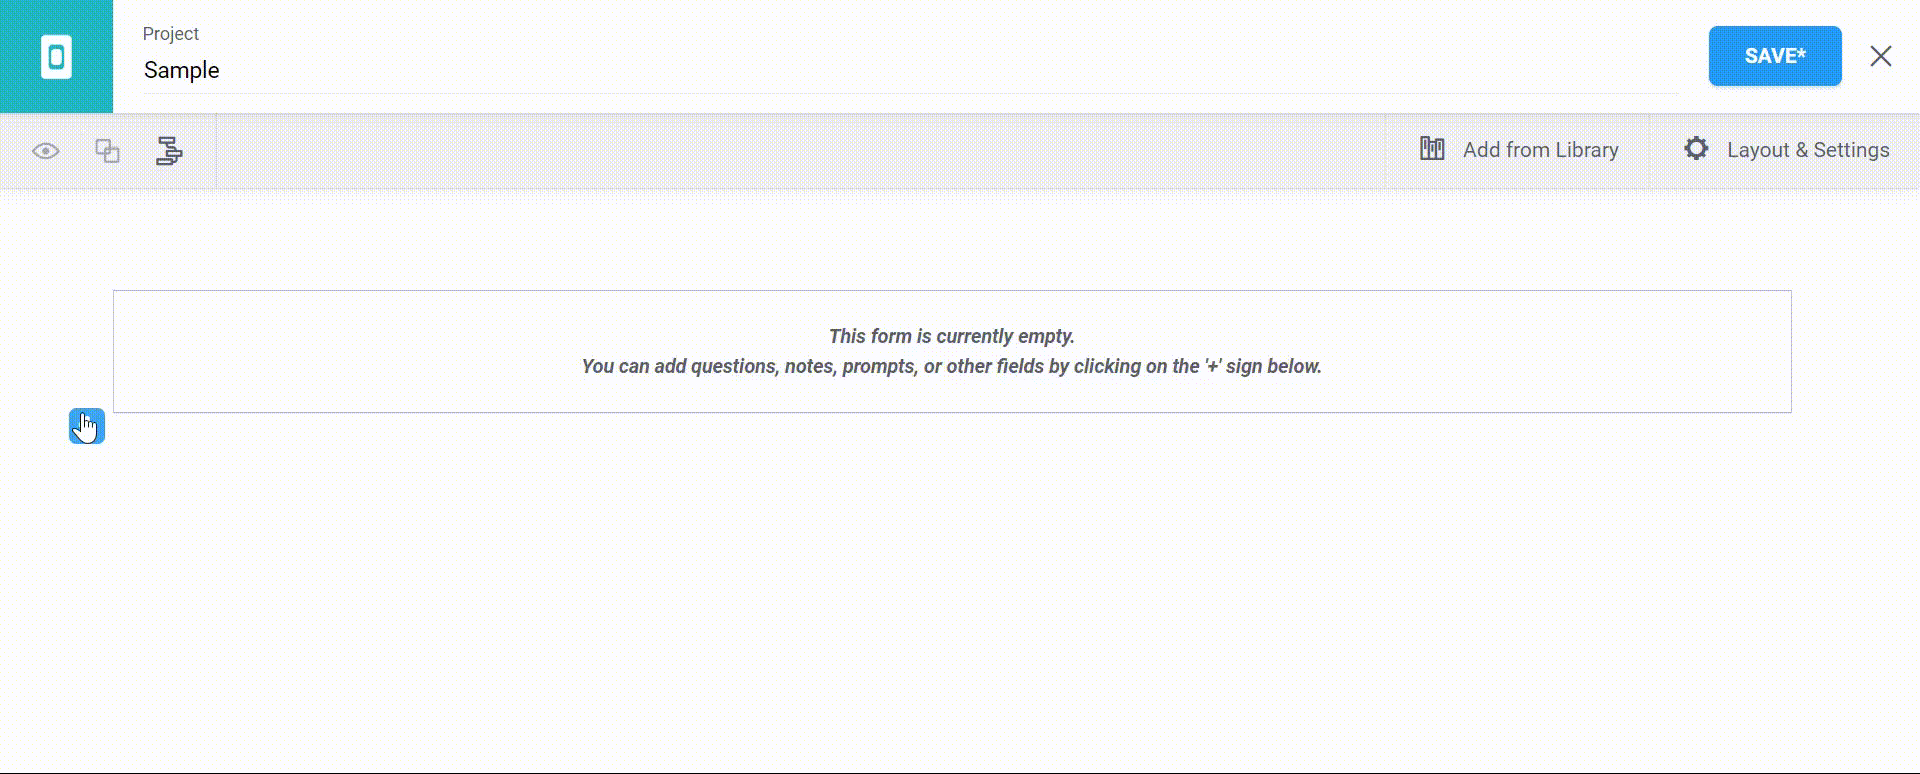
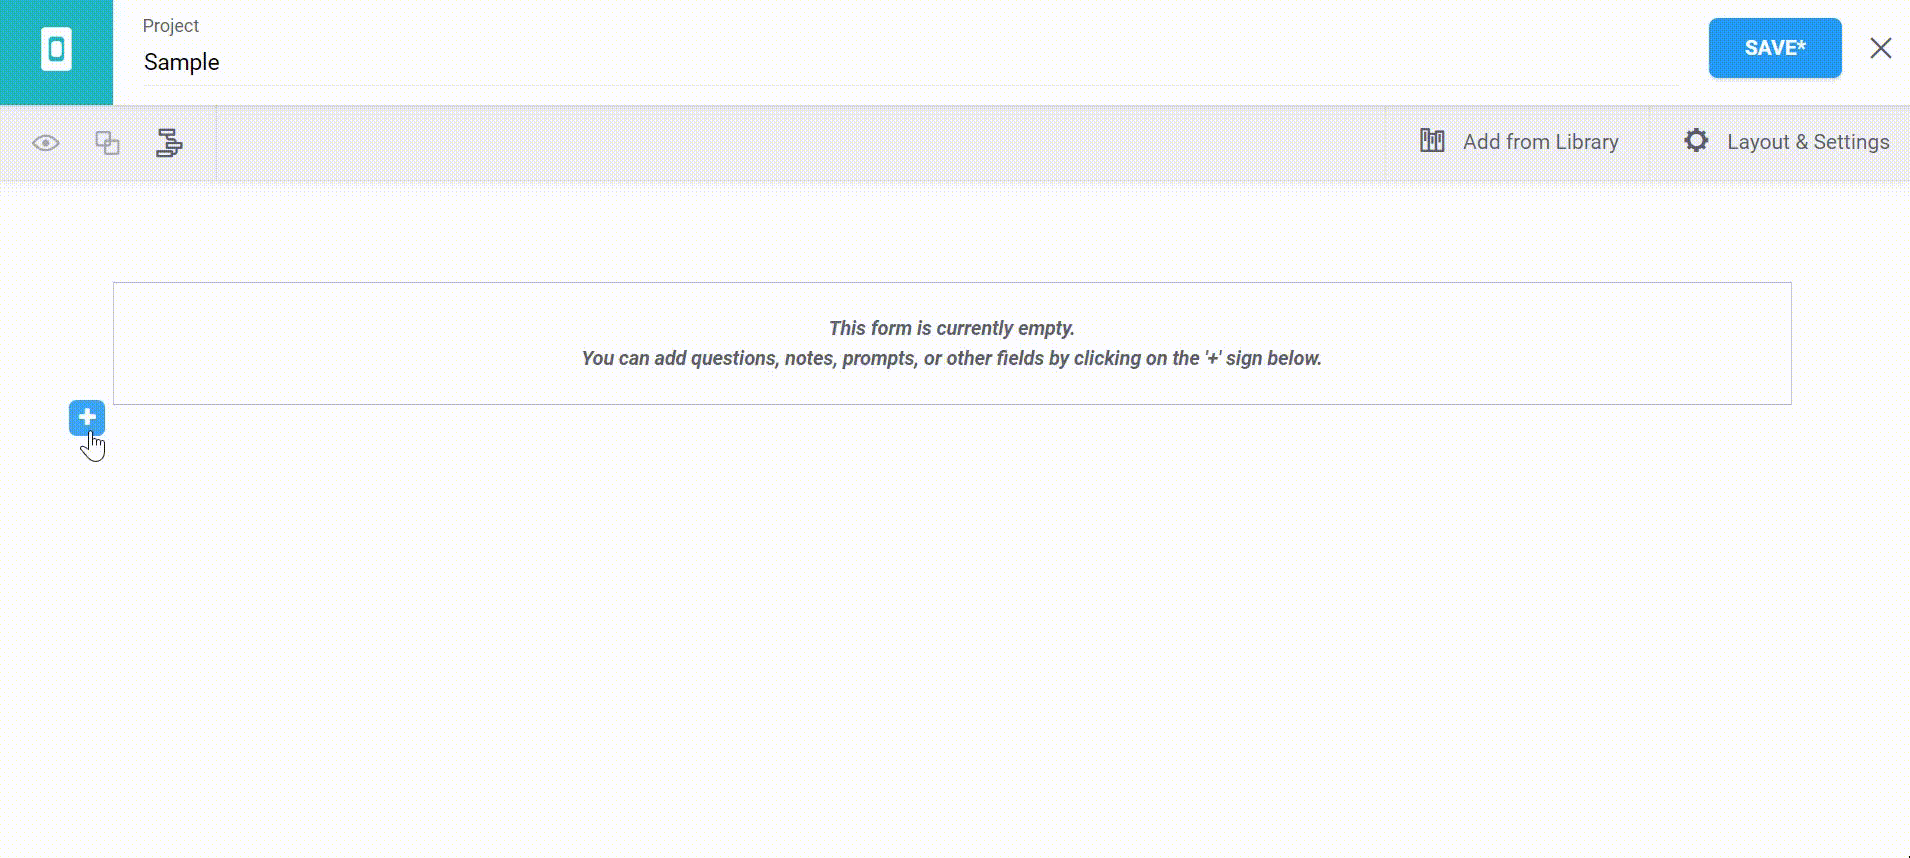
Point to remember: An asterisk* on the save button (save*) indicates that your work is unsaved. Always remember to SAVE your questions as you progress using the save button.
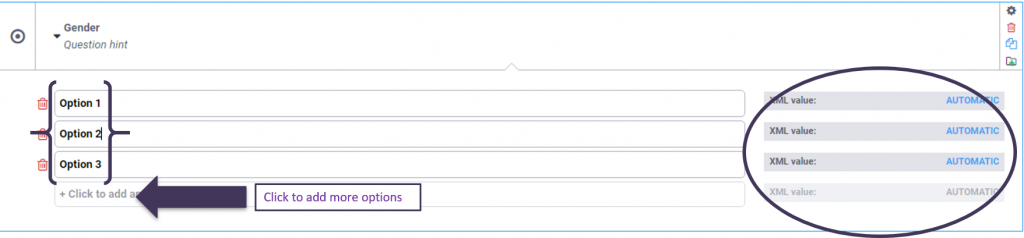
1. Select One
Multiple choice question; only one answer can be selected.
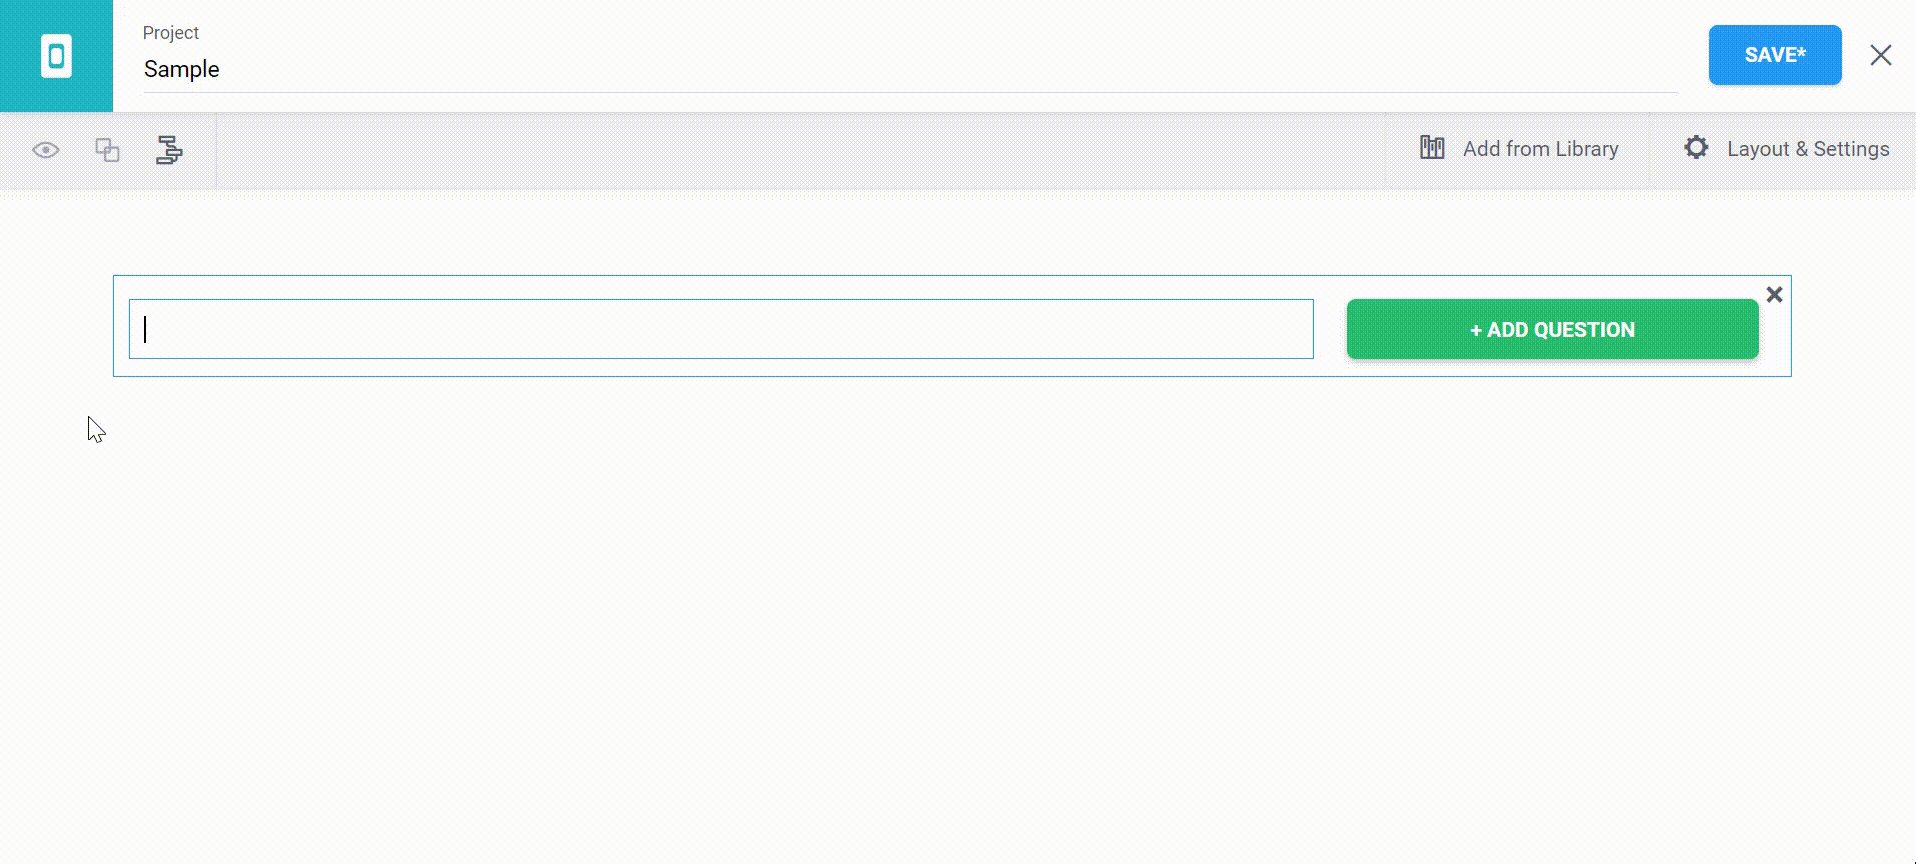
Step 1: Type your question in the field bow, then click add question.

Step 2: Choose ![]()
Step 3: Input options in the field by double clicking. You can add more options by clicking on the area shown.
*The circled part represents a section where you can code for XML values, should data be exported for further analysis with statistical software such as SPSS, or Stata. XML values are coded in the sense that each numeric code represents an option. This makes it easier for data analysis, i.e.,
Option 1 = 1
Option 2 = 2
Option 3 = 3
Step 4: Click on the ![]() icon to preview the form.
icon to preview the form.

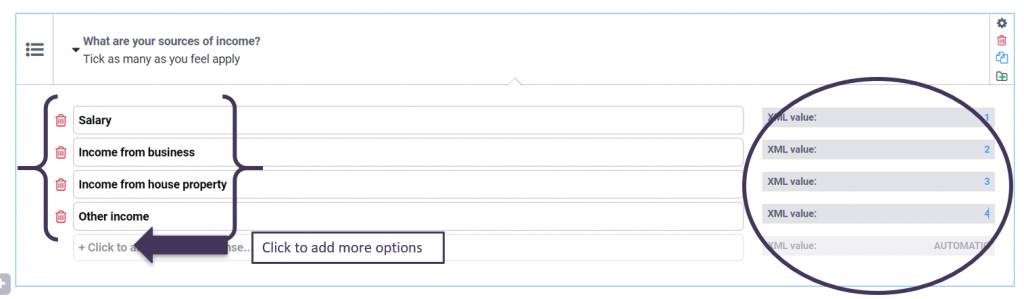
2. Select Many
Multiple choice question; multiple answers can be selected.
*Answer options can still be restricted to a selected maximum, you can also make sure that some cannot be chosen together.
Step 1: Type your question in the field, then click add question.
Step 2: Choose ![]()
Step 3: Input options in the field by double clicking. You can add more options by clicking on the area shown.
Step 4: Click on the ![]() icon to preview the form.
icon to preview the form.

*Note: The area labelled question hint on the form is used to give further information to the interviewer.
3. Text
Free text response
Step 1: Type your question, then click add question.

Step 2: Choose ![]()
Step 3: Click on the ![]() icon to preview the form.
icon to preview the form.
4. Number
Integer (i.e., whole number) input.
Step 1: Type your question, then click add question.
Step 2: Choose ![]() .
.
Step 3: Click on the ![]() icon to preview the form.
icon to preview the form.

5. Decimal
Decimal number input.
Step 1: Type your question, then click add question.
Step 2: Choose ![]()
Step 3: Click on the ![]() icon to preview the form.
icon to preview the form.
*Note: The area labelled question hint is used to add additional information.

6. Date
Date input.
Step 1: Type your question, then click add question.
Step 2: Choose ![]()
Step 3: Click on the ![]() icon to preview the form.
icon to preview the form.

7. Time
Time input.
Step 1: Type your question, then click add question.
Step 2: Choose ![]()
Step 3: Click on the ![]() icon to preview the form
icon to preview the form

8. Date and Time
Accepts a date and a time input at the same time.
Step 1: Type your question, then click add question.
Step 2: Choose ![]()
Step 3: Click on the ![]() icon to preview the form.
icon to preview the form.

9. GPS Point
Collect a single GPS coordinate.
Step 1: Type your question, then click add question.
Step 2: Choose ![]()
Step 3: Click on the ![]() to preview the form.
to preview the form.

*Note: On the phone app, this will look different, and you can collect the GPS point directly.
10. Photo
Take a picture (image).
Step 1: Type your question, then click add question.
Step 2: Choose ![]()
Step 3: Click on the ![]() icon to preview the form.
icon to preview the form.

11. Audio Recording
Take an audio recording.
Step 1: Type your question, then click add question.
Step 2: Choose ![]()
Step 3: Click on ![]() icon to preview the form.
icon to preview the form.

12. Video Recording
Take a video recording.
Step 1: Type your question, then click add question.
Step 2: Choose ![]()
Step 3: Click on the ![]() icon to preview the form.
icon to preview the form.
13. Geo Line
Geotrace. Record a line of two or more GPS coordinates.
Step 1: Type the question, then click add question.
Step 2: Choose ![]()
Step 3: Click on ![]() icon to preview the form.
icon to preview the form.

14. Note
Display a note on the screen, takes no input.
Step 1: Type the text e.g., instructions, then click add question.
Step 2: Choose ![]()
Step 3: Click on ![]() icon to preview the form.
icon to preview the form.

15. Barcode / QR Code
Scan a barcode/QR Code; requires the barcode scanner app to be installed.
Step 1: Type the question, then click add question.
Step 2: Choose ![]()
Step 3: Click on ![]() icon to preview the form.
icon to preview the form.

16. Acknowledge
It is an acknowledge prompt that sets value to ‘ok’ if selected.
Step 1: Type the instructions for the acknowledgement.
Step 2: Choose ![]()
Step 3: Click on the ![]() icon to preview the form.
icon to preview the form.

17. GPS Area
Record a polygon of multiple GPS coordinates; the last point is the same as the first point.
Step 1: Type the question, then click add question.
Step 2: Choose ![]()
Step 3: Click on the ![]() icon to preview the form.
icon to preview the form.

18. Range
Enter a number within a specified range.
Step 1: Type out the question, then click add question.
Step 2: Choose ![]()
Step 3: Input your desired range in the areas labelled ‘start’ and ‘end’. The area labelled ‘step’ indicates the interval you would like to put between one range value and the next.

Step 4: Click on the ![]() icon to preview the form.
icon to preview the form.
19. Rating
Creates rating questions.
Step 1: Type the question, then click add question.
Step 2: Choose ![]()
Step 3: Enter the question you would like respondent to rate, then replace the field labelled option with specific choices that you would like the respondent to choose from.
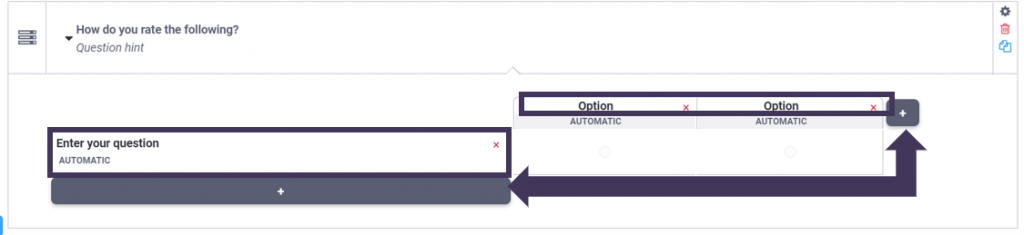
Note: The ‘+’ sign shown above enables you to add more questions.
Step 4: Click on the ![]() icon to preview the form.
icon to preview the form.
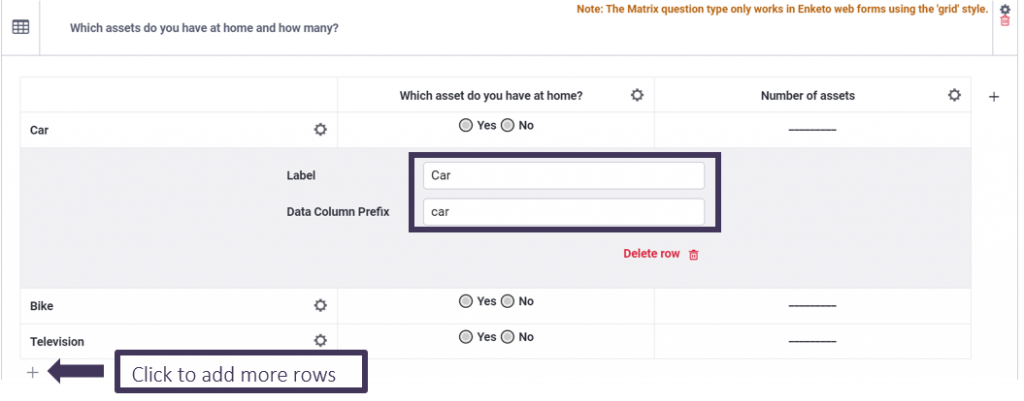
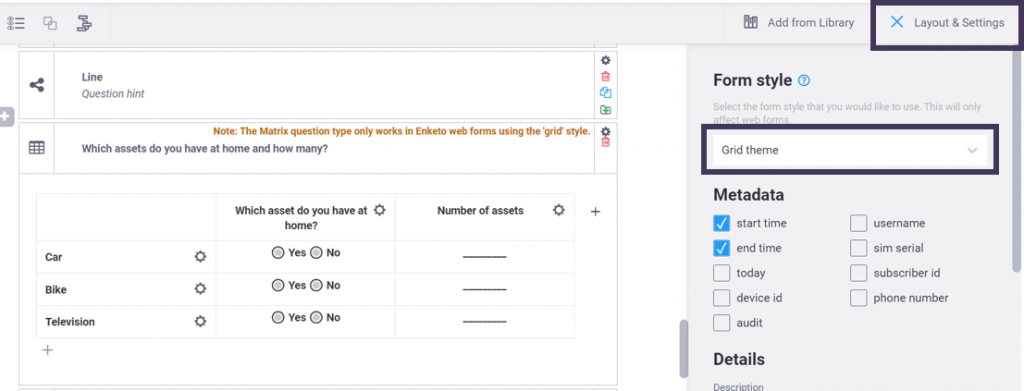
20. Question Matrix
It only works on Enketo webforms using the ‘grid style’.
Step 1: Type the question, then click add question.
Step 2: Choose ![]()
Step 3: Click on column, then choose the response type using the drop-down button shown.
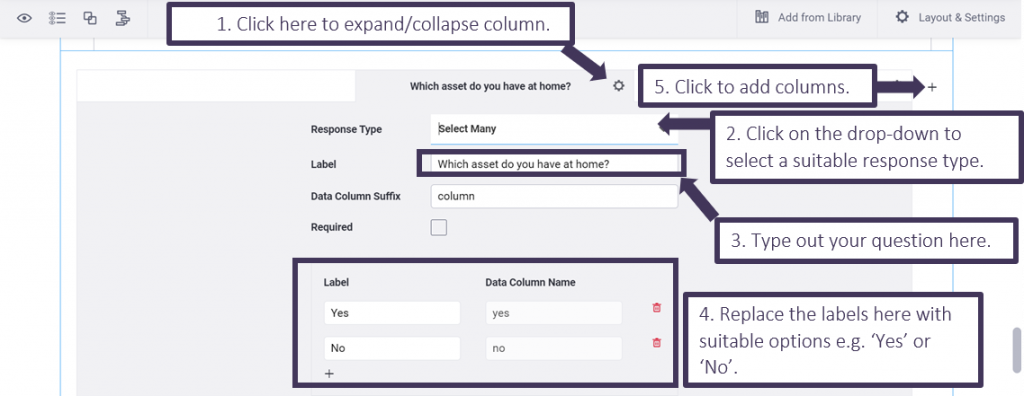
Step 4: Proceed to the section called ‘label’ then type one that fits your survey.
*Note: After changing the label name, the column will be renamed using the text that has been typed in.
Step 5: On the second ‘label’, replace the options with choices that fit your survey.
Step 6: Collapse the column.
Head over to ‘row’ and click on the settings icon to expand it. Change the label to input your desired options.
To change the layout to ‘grid’ style, click on the ‘layout & settings’ tab, then click on the drop-down on ‘form style’ to select a suitable option e.g., ‘grid theme’. Click on the layout & settings tab once more to collapse the section.
Step 7: Click on the ![]() icon to preview the form.
icon to preview the form.
21. Ranking
Creates a ranking.
Step 1: Type the question, then click add question.
Step 2: Choose ![]()
Step 3: Click on the area labelled ‘item to be ranked’ then type the item you want the respondent to rank.

Step 4: Click on the ![]() icon to preview the form.
icon to preview the form.

22. Calculate
Perform a calculation.This happens only in the background and is not visible in the survey.
To calculate the total number of children under the age of 18 in a household (boys + girls):
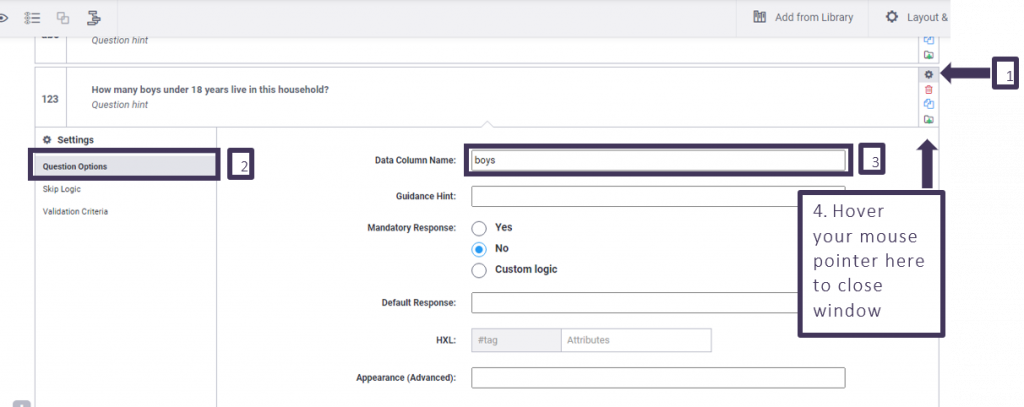
Step 1: Type the question ‘How many boys under 18 years live in this household?’, then click add question.
Step 2: Choose ![]()
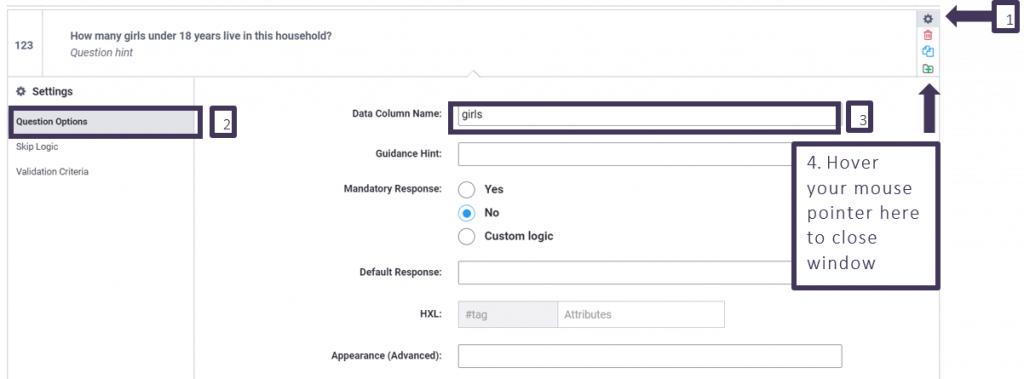
Step 3: Click on the settings icon of the question, and go over to question options.
Step 4: Rename the data column name as ‘boys.’
Step 5: Close the window by hovering your mouse pointer on the area shown to locate a ‘X’ icon.
Step 6: Type out the question ‘How many girls under 18 years live in this household?’, then click add question.
Step 7: Choose ![]()
Step 8: Repeat steps 3, 4 and 5. In step 4, rename the data column as ‘girls.’
Step 9: Type the question ‘${boys}+${girls} ’, then click add question.
Step 10: Choose ![]()
![]()
Step 11: Click on the ![]() icon to preview the form.
icon to preview the form.
23. File
Upload a file (txt, pdf, xls, xlsx, doc, docx, rtf, zip).
Step 1: Type the question ‘${boys}+${girls} ’, then click add question.
Step 2: Choose ![]()
Step 3: Click on the ![]() icon to preview the form.
icon to preview the form.
24. Hidden
Hide questions from respondents e.g., pre-filled information.
Step 1: Type the question ‘${boys}+${girls} ’, then click add question.
Step 2: Choose ![]()
Step 3: Click on the ![]() icon to preview the form.
icon to preview the form.
Note: The hidden questions will not be displayed on the form