HOW WE CAN HELP?
ODK Central
ODK Central is self-hosted, and production ready. It manages user accounts and permissions, stores form definitions, and allows data collection through clients like ODK Collect.
Why use ODK Central?
- It has managed encryption that makes the process of handling encrypted form data significantly easier and in many cases more secure. Forms can be encrypted too
- Direct upload of XLSForm files makes form management easier
- Projects tabs lets you partition your server into different sandboxes to support multiple independent teams
- The *OData API makes it easy to synchronize your submitted form data to desktop visualization tools
- It has advanced user permissioning (authorization), therefore it can be used by multiple user tiers
*Odata is a standard of transferring data between tools and services. Tools for data analysis include Ms. Excel, Ms. Power BI, and Tableau. These tools can fetch data over Odata for analysis. However, this only works if encrypted storage is not activated.
HOW TO USE ODK CENTRAL:
MANAGE WEB USERS
This is meant to grant multiple users access to the ODK Central platform.
To do this:
Step 1: Go to the users tab and click on ![]() button and a popup window appears, prompting you to input your email address, and a display name.
button and a popup window appears, prompting you to input your email address, and a display name.
Step 2: Input your email address, and a display name, then click on create
Step 3: Visit your inbox to check if you have received an email with the subject line “ODK Central account created”.
Note: If you do not see the email, check your spam folder. In the email, there will be a link which will allow the recipient to set a password for their new account, after which they will be able to log in.
Look at the illustration below:

The users settings interface has 4 components:
Display name: This is simply the username.
Email address: This is simply the email address that you input to login into your account
Site wide role: Here, the different users can be assigned various roles. e.g., administrator or none.
Actions: Here you can choose to edit your profile, reset password or retire user.
Look at the illustration below

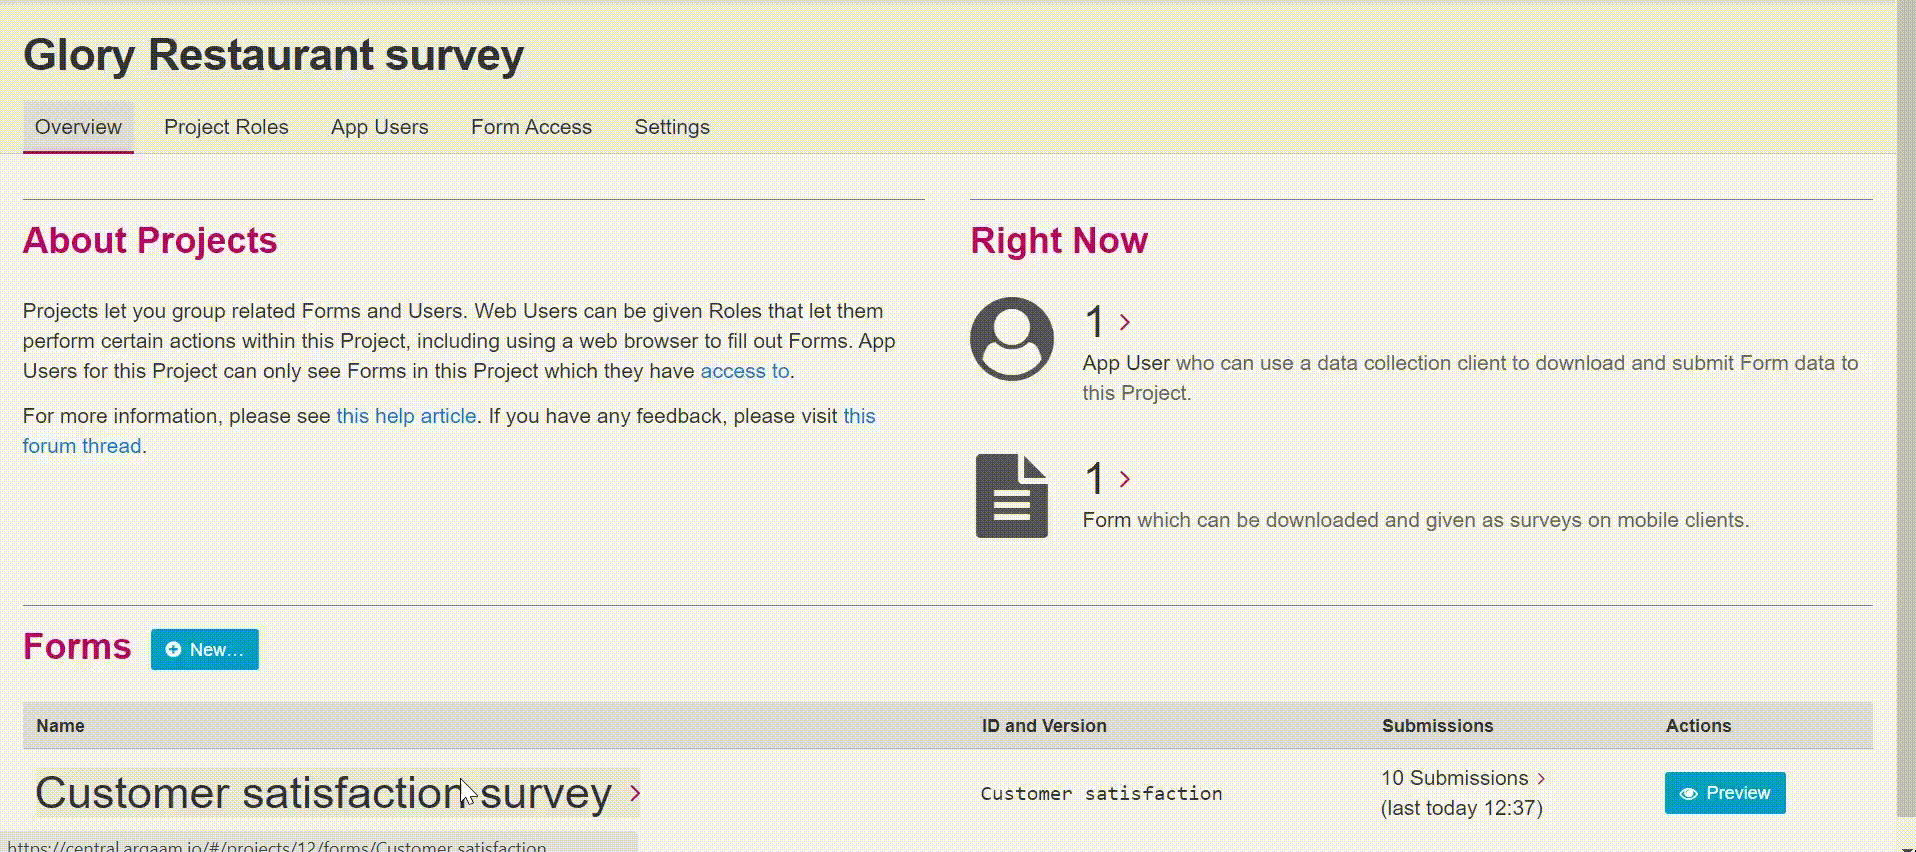
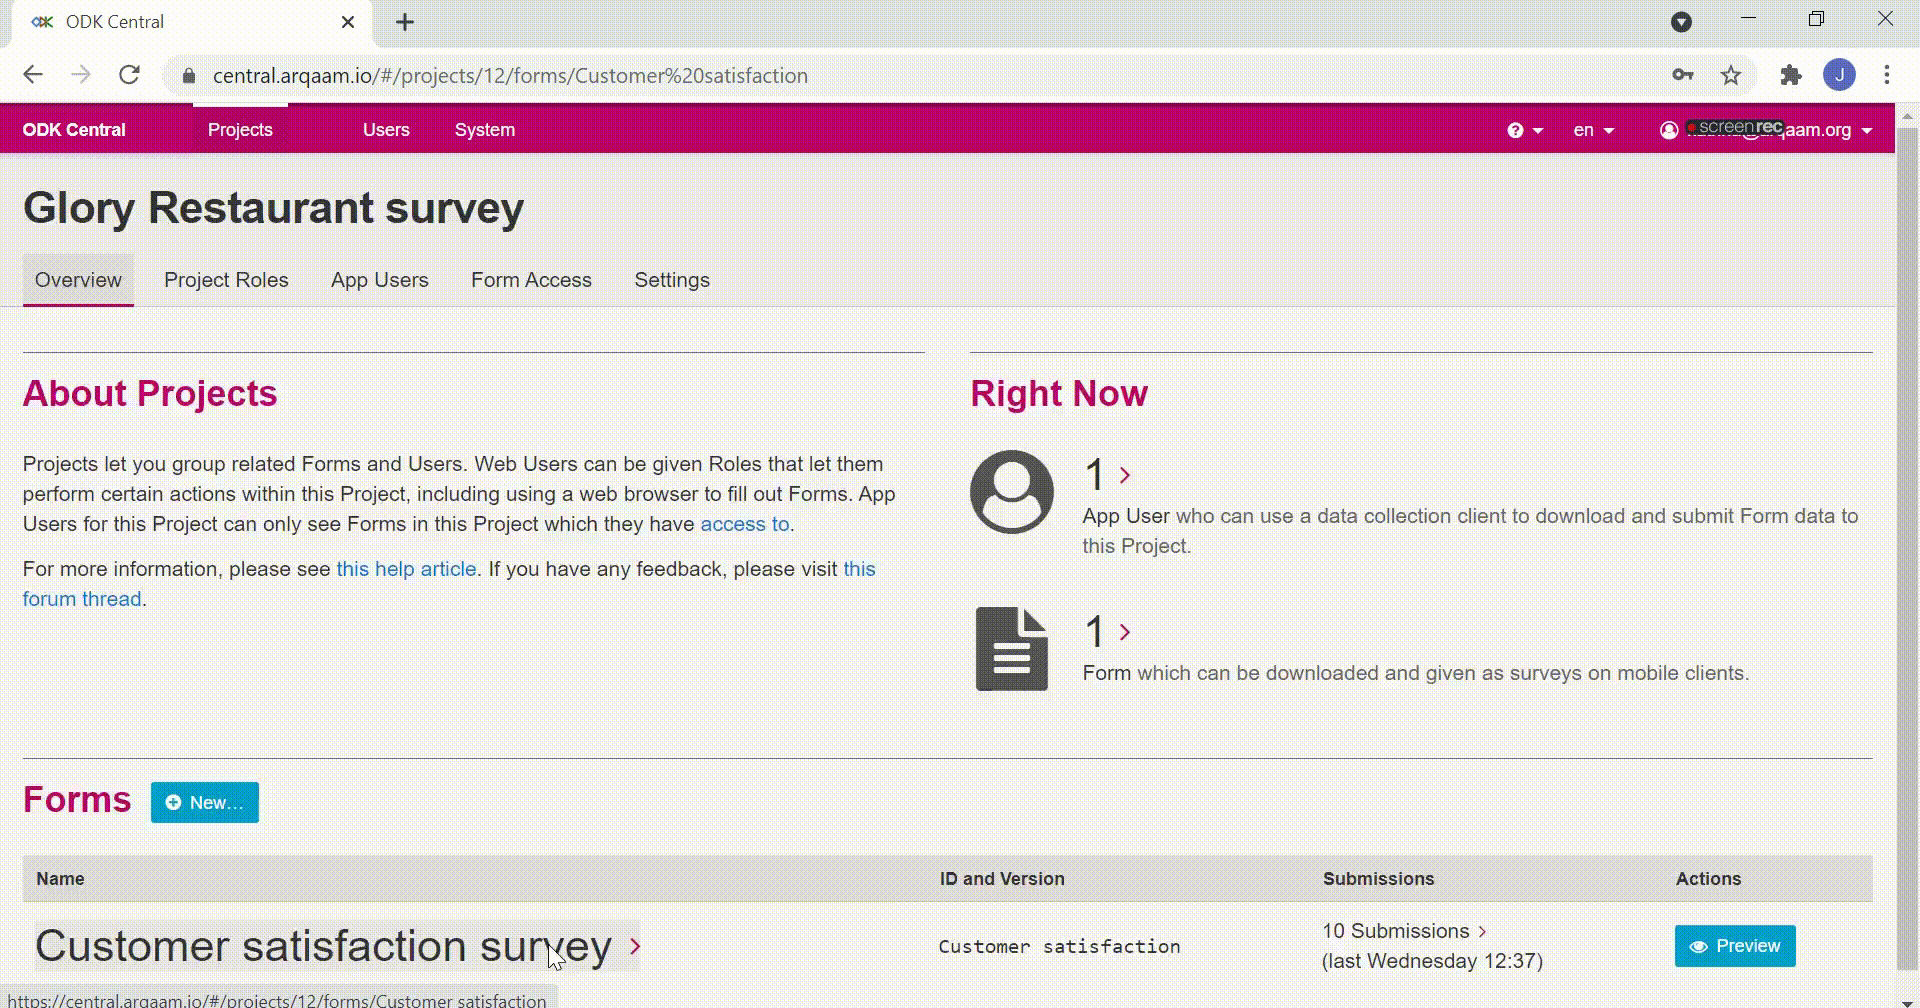
MANAGING PROJECTS IN ODK CENTRAL
It is possible to create projects in ODK Central. A single project in Central can hold several forms for instance, a baseline survey, midline survey, pre and post-test surveys etc. This creates good organization, and traceability since related survey forms fall under a single title.
To do this:
Step 1: On the projects tab, go to the projects section, then click on new
Step 2: A popup window appears prompting you to fill in the name of your project. Thereafter, click on create
Creating projects in ODK Central
Your project shall be created, and you will be prompted to create a form. This is done by uploading an Xform, XML file or an XLSForm.
Look at the illustration below

To preview your uploaded form, click on the ![]() button. Note that the web preview uses Enketo (same as Kobotoolbox for web versions).
button. Note that the web preview uses Enketo (same as Kobotoolbox for web versions).
Look at the illustration below

Replacing a draft form
You might decide to replace (update) your form. To do this, click on the ![]() button
button
Look at the illustration below

TESTING THE FORM
Testing a form is important to make sure that the form appears and performs as expected. Form errors can therefore be detected early, and rectified before the form is deployed to the field for data collection.
*Note: Test submissions are not included in your final data. This is essential so as not to create conflict between field data, and sample data.
To do this:
Step 1: Click on the tab labelled testing on the main projects tab
Step 2: Click on new in the area labelled draft testing. A new tab opens containing the survey on Enketo
Step 3: Fill in the survey then submit
Step 4: Go back to your ODK Central tab, then click on refresh so as to see the submission
Look at the illustration below

To connect ODK Central to ODK Collect
Step 1: Click on the option labelled testing on the projects tab
Step 2: Click on new in the area labelled draft testing.
Step 3: Open the ODK collect app, then click on ![]() , and select configure via QR code option
, and select configure via QR code option
Step 3: Scan the QR code found on your screen
Step 4: On your ODK collect app, select get blank form, then choose the survey form by ticking the checkbox, then the option get selected at the very bottom of your device.
Step 5: Select fill blank form, to fill in your survey.
*Remember to submit your survey after you are done.
Step 6: Go back to your ODK Central tab, then click on refresh so as to see the submission (as explain previously in 3. testing the form section)
Look at the illustration below

After submitting the forms, download the records for data analysis
To do this:
Step 1: Still on the area labelled draft testing, find the ![]() button, and click on the drop-down to explore the various options i.e., all data and media files (.zip), all data without media files (.zip), primary data table (.csv)
button, and click on the drop-down to explore the various options i.e., all data and media files (.zip), all data without media files (.zip), primary data table (.csv)
Step 2: Choose the most preferred option
Look at the illustration below.

PUBLISHING A FORM
To do this:
Step 1: Open your survey form
Step 2: Go over to the section labelled actions and click on the ![]() button
button
Step 3: A popup window appears which prompts you to confirm the publishing of the draft form. Click on proceed to confirm this.

Note: The tabs Overview, Versions, Submissions, Public Access and Settings are active only when the form has been published.
ADDITIONAL INFORMATION
ASSIGNING PROJECT ROLES TO USERS
Different roles can be assigned to the various ODK central users. These roles are:
- Project Managers– They perform any administrative task related to the project and can fill forms out in a web browser
- Project Viewers- They can access and download all form data in the project, but cannot make any changes to settings or data
- Data Collectors- They can fill forms out in a web browser, but cannot view or change data or settings
To do this:
Step 1: Go to the projects tab, then select the form you want to assign roles to
Step 2: Proceed to click on the project roles tab on the form
Step 3: Proceed to search for a user, then press the enter key on your keyboard
Step 4: Assign a project role to the user by selecting the ![]() drop-down
drop-down
Look at the illustration below:

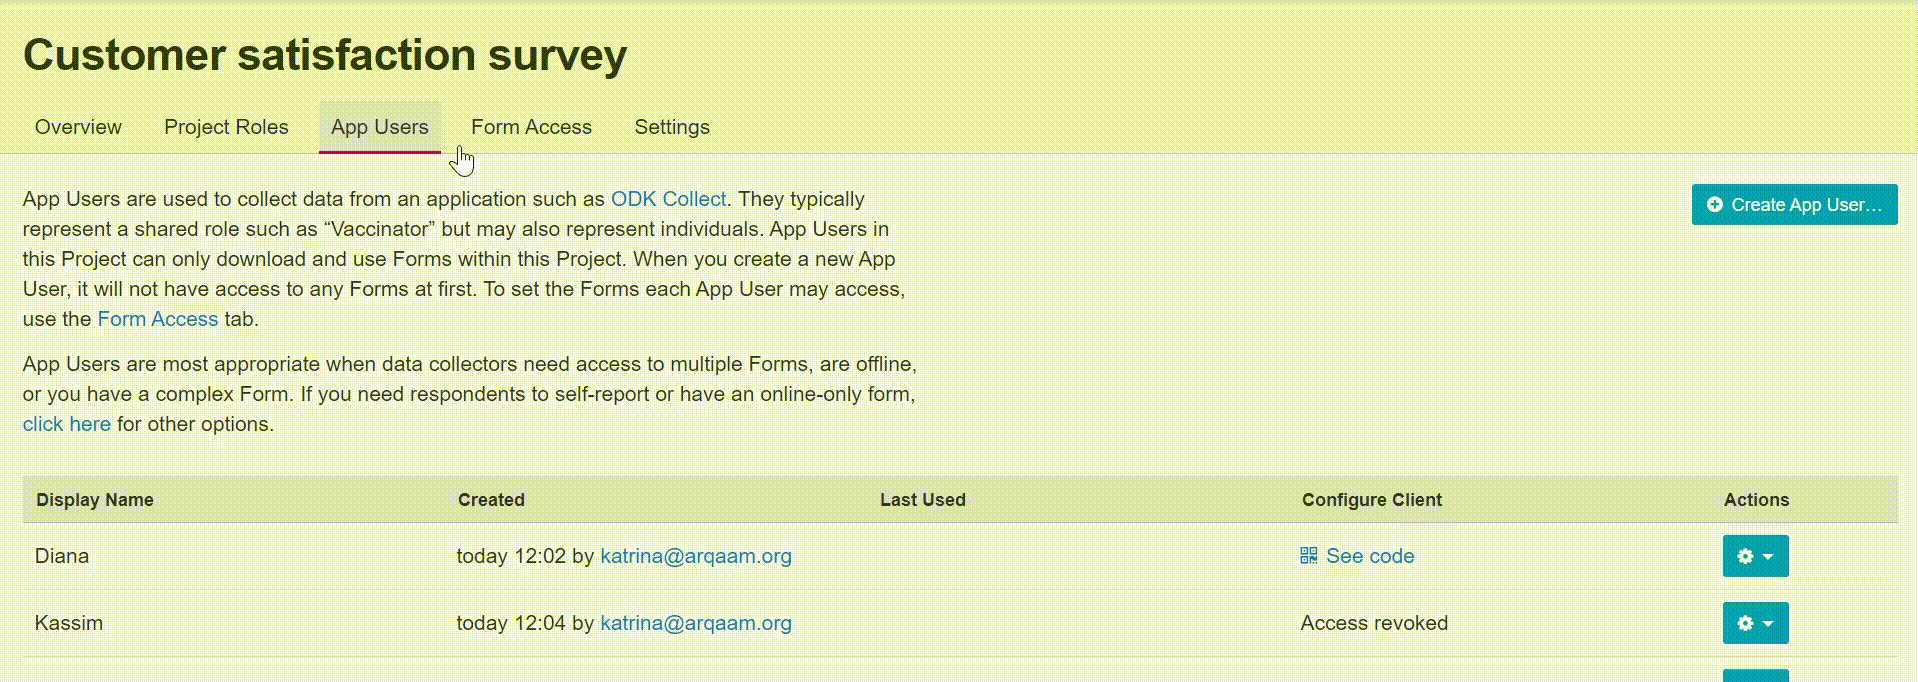
MANAGING APP USERS
It is possible to grant an app user access to the project through the ODK Collect app on their mobile device.
To do this:
Step 1: Go to the projects tab, then select the form you want to manage apps to
Step 2: Go to app users tab, then click on the ![]() button
button
Step 3: Enter the name of the app user, then click on the create button
Step 4: A QR code appears for the app user to scan in order to access the form

After setting up the app user, the QR code can also be accessed by clicking on ![]()

Note: App users never gain any access to the management website: they do not have email addresses or passwords associated with their account, only a name so you can differentiate them.
App user access to the form can be revoked. Simply head over to the user whose access you want to revoke. In the section labelled actions, click on the drop down, then revoke access. Lastly, click on yes, proceed.

A newly created app user does not have access to any forms. To grant them access, go use the form access tab on your project form. Tick on the checkbox, of the app user you want to grant access to the form. Thereafter, click on save.

ENCRYPTING FORMS IN ODK CENTRAL
Step 1: Go to the projects tab, then select the form you want to encrypt
Step 2: Click on the ![]() button
button
Step 3: A popup window appears, then click on next
Step 3: Proceed to input your passphrase and passphrase hint (optional), then click on next
Step 4: You will receive a confirmation that encryption has been enabled. Click on done to finish

FORM STATES
The state of a form can be changed; this can be done by controlling its lifecycle (period in which the form is open for submissions to when submissions are closed).
In ODK central, 3 form states exist i.e.:
Open – The forms are available to download on mobile devices, and will accept new submissions.
Closing– The forms will accept new submissions, but are not available to download on mobile devices.
Closed– The forms are not available to download on mobile devices, and will not accept new submissions
To change the form state:
Step 1: Go to the file access tab on your opened form
Step 2: Click on the drop-down under the area labelled state
Step 3: Choose the most suitable state, then click on the save button located at the top-right corner
You shall receive a confirmation that your changes have been made.
FORMS WITH ATTACHMENTS (MEDIA, VIDEO, AUDIO ETC.)
If your form references any external files (images, audio, or video included as part of your question, or data lookup files used to populate selection lists), ODK Central will see this and open up some additional displays and controls for you to provide those external files.
Note: For ODK Central you do not need to upload the form attachments to your smart phone in the case you are using ODK Collect app for data collection.
To do this:
Step 1: Open your uploaded form
Step 2: Go to media files tab, then click on![]() button
button
Step 3: A popup window appears a prompting you to choose files that you would like to upload
Step 4: After uploading the files, you may opt to preview the form
Step 5: To preview the form, go to status option then click on the ![]() button
button
Step 6: The previewed form appears in another window
Look at the illustration below

DELETING A DRAFT FORM
Step 1: Select the form
Step 2: In the status option, click on the ![]() button
button
Step 3: A popup window appears prompting you if you wish to proceed with the action, and you confirm yes by clicking abandon

PUBLIC ACCESS LINKS (FEATURE ONLY AVAILABLE FOR PUBLISHED FORMS)
ODK Central allows the distribution of surveys to a wide group of respondents using Public Access Links. These Links take recipients directly to the form through their web browser, and is administered by Enketo.
Step 1: Open your form
Step 2: Go to the public access tab, then click on ![]() button
button
Step 3: A popup window appears prompting you to input a display name. The display name is simply aimed at helping you track the form by reminding you of whom you administered it to, when its intended to be active etc.
Step 4: You might decide to tick the checkbox that restricts to only one submission per user. This enables basic protection against more than one Submission being made from the same browser. The link can now be copied to a browser, or sent to the intended users for data collection

A public access link can be revoked. Simply open your form, then proceed to the public access tab. Thereafter, click on the ![]() button. The options to proceed or cancel are presented of which you can choose your desired option.
button. The options to proceed or cancel are presented of which you can choose your desired option.

DELETING A PUBLISHED FORM
Step 1: Open your form
Step 2: Proceed to the settings tab, then click on ![]() button
button
Step 3: A popup window appears prompting you to proceed with the action, or cancel it
Look at the illustration below

FORM SUBMISSION USING MOBILE DEVICES
The same procedure applies as previously discussed under the Managing users section, earlier on in this document.
DOWNLOADING SUBMISSIONS OF PUBLISHED FORMS
To download the form:
Step 1: Open your form
Step 2: Go to the submissions tab
Step 3: Click on the ![]() drop-down button to choose various options on how to download your submissions e.g., as .zip or .csv
drop-down button to choose various options on how to download your submissions e.g., as .zip or .csv
Look at the illustration below
CONNECTING SUBMISSION DATA OVER ODATA
It is possible to connect third party tools to ODK Central via Odata. These third-party tools include but not limited to, Ms. Excel, Ms. Power BI, R and Tableau.
Connecting ODK Central to Ms. Excel via Odata
Step 1: Open your form
Step 2: Go to the submissions tab, then click on ![]() button
button
Step 3: A popup window appears prompting you to copy the URL link
Step 4: Open up an Ms. Excel workbook, then go to the data tab > Get data > From other sources > From Odata feed
Step 5: A popup window appears prompting you to paste the copied URL, then click on Ok
Step 6: Switch to basic authentication, then enter your ODK Central login credentials, and click connect
Step 7: A navigator window open up. Select submissions, then transform data so as to clean the data on Power query before data analysis.
Look at the illustrations below:
Connecting ODK Central to Ms. Power BI via Odata
Step 1: Open your form
Step 2: Go to the submissions tab, then click on ![]() button
button
Step 3: A popup window appears prompting you to copy the URL link
Step 4: Open Power BI, click on get data, then Odata feed
Step 5: A popup window appears prompting you to paste the copied URL, then click on Ok
Step 6: Switch to basic authentication, then enter your ODK Central login credentials, and click connect
Step 7: A navigator window open up. Select submissions, then transform data so as to clean the data on Power query before data analysis.

REPLACING A PUBLISHED FORM
A published form can be replaced by a revised version.
To do this:
Step 1: Open your form
Step 2: Click on the ![]() button
button
Step 3: The same procedure for replacing a published form is similar to that of replacing a draft form

Note: When a new form version is published in place of an old one, all the previous submissions continue to exist, and will export along with all your data over zip download or OData. However, only the current form definition will be used in that export: if, for example, you have deleted a field that used to exist, that field will not appear in the export.
ACCESSING OLDER FORM VERSIONS
For instance, if multiple versions of a form have been published, they can be viewed at the versions tab of your form.
Step 1: Open your survey form, then proceed to the versions tab
Step 2: Click on the![]() drop-down to view the options i.e., view the form as XML in browser or download as XForm
drop-down to view the options i.e., view the form as XML in browser or download as XForm

ARCHIVING A PROJECT
Step 1: Open your form
Step 2: Go the settings tab, click on ![]() button
button
Step 3: Confirm the action by clicking yes, proceed or denounce by clicking on no, cancel option
Look at the illustration below
